FPGA Validation
Once the project has been successfully programmed onto the FPGA, it’s time to test it in real hardware:
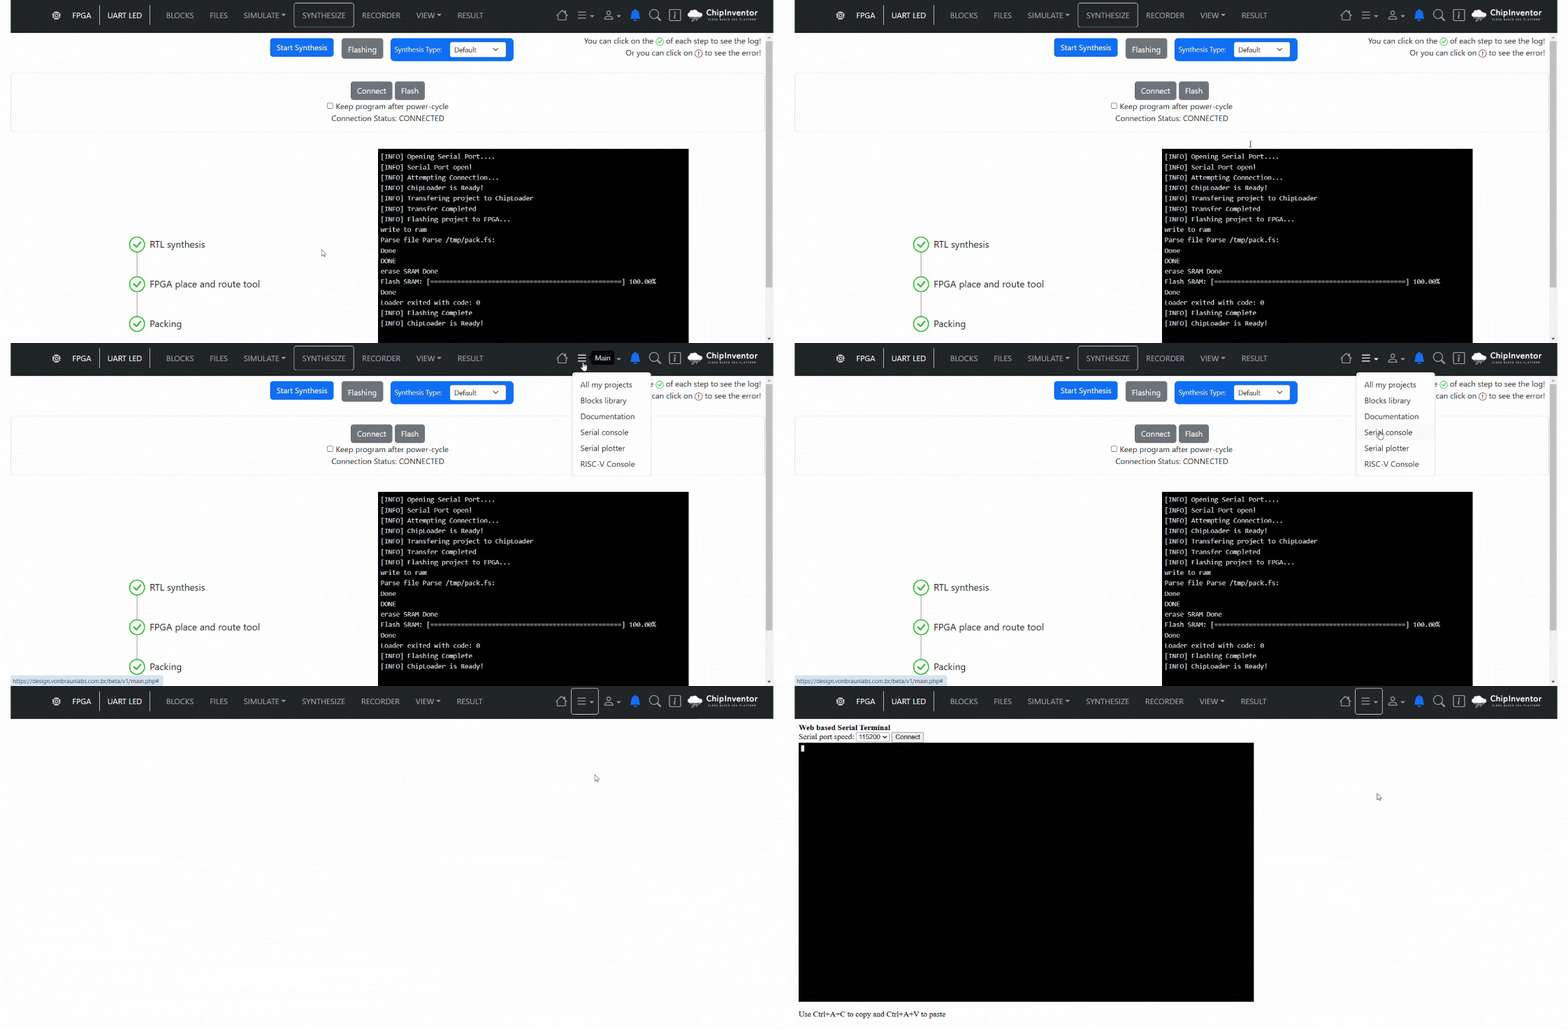
1. In the main top tab, click on Main in the top right corner.
2. Click on Serial Console:
- Make sure the baud rate and other serial settings match the configuration you used (for example, 115200 baud).
3. Send Data
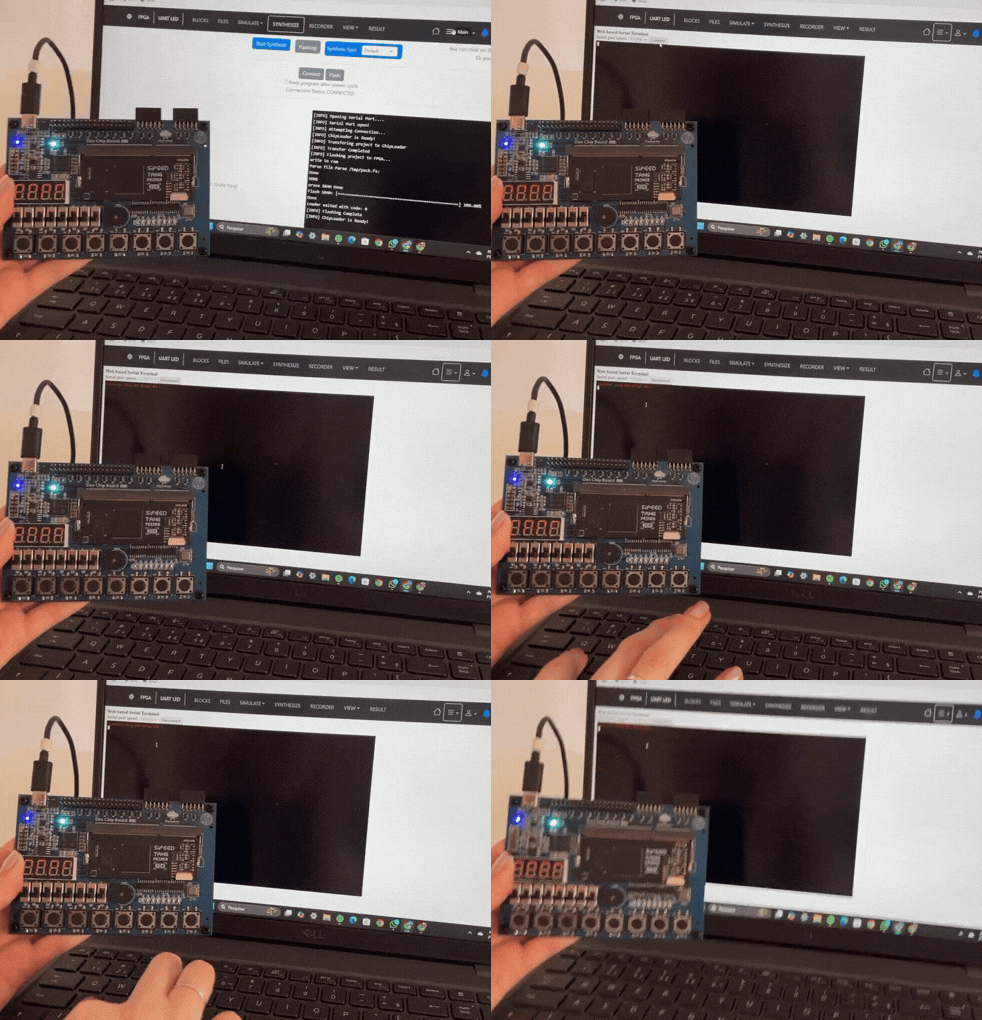
- In the Serial Monitor, type the letter a and press Enter (or just type it if the terminal sends characters immediately).
- The LED on the FPGA board should light up, indicating the received byte matches "a".
4. Test Other Keys
- Type any letter other than a.
- The LED should remain off, confirming that the logic only turns it on when "a" is received.
5. Verify the Behavior
- If the LED does not respond as expected, revisit your connections and block parameters in ChipInventor.
- Once confirmed, your design is validated.


No Comments